Kristine Soares Photography

Kristine Soares Photography

Recipes

Baking (7) Breads (3) Breakfast (6) Chicken (2) Chocolate (1) Condiments (4) Dessert (9) Dinner (12) Eggs (2) Fruit (3) Lunch (4) Pasta (3) Salad (2) Seafood (4) Snack (1) Snacks (11) Soup (2) Vegetables (8)
Showing posts with label Breads. Show all posts

Friday, March 28, 2014

All Good Things- The night I made crab cakes from Heaven


One night, my husband and I were watching America's Test Kitchen. This episode was about crab and how to make the perfect crab cake. That sparked a craving. I haven't had a good crab cake in a long time. Most restaurants serve crab cakes that are mostly filled with breadcrumbs and not a whole lot of crab. I wanted to take a stab at ATK's version, with a little twist of my own. But I didn't want to stop there, I wanted to make the buns and an aioli to top it. This was going to be the ultimate crab cake.

Before I begin, my eyes glance at a sign that has become a fixture in our kitchen. It may seem sappy, but this rings true for the love in our little family. We have gone through our share of struggles, but no matter what, we will hang on to that deep love and respect we have for one another.


First I started with the buns. I had mentioned that a book I often refer to is The Homemade Pantry by Alana Chernila. Once again, I turned to her for her expertise. http://www.eatingfromthegroundup.com/2009/09/brioche-hamburger-buns-and-passing-the-love-updated/

Ingredients:

1 cup warm water
3 tbsp milk
2 tsp active dry yeast
2 tbsp sugar
3 large eggs
3 3/4 cups of flour plus some for covering work surface
1 1/2 tsp salt
2 1/2 tbsp unsalted room temperature butter
If you'd like toppings you can use poppy seeds, sesame seeds, coarse salt etc

In a measuring cup I add the warm water, milk and sugar, mix and let it stand for 5 minutes. Let it get all foamy on top.

I had a little oops, which turned out to be great. This differs from the original recipe, but I liked the outcome. I beat 3 eggs instead of 2. If you want to try it my oops way, just know you will need a fourth egg for the egg wash later.

I weigh my flour and add the salt. Then I add the butter in pats and use my fingers to gently mix into the flour.


Add the eggs and the yeast to the flour and mix well with hands until a dough forms. On a floured surface, knead the dough for about 10-15 minutes until the dough is pliable and can form a nice smooth ball.


I rub a little olive oil on the bowl I put the dough into so it won't stick. Cover with plastic and let it rise for 2 hours.

Then I go to work on the aioli. This is just "fancy" mayo.

Ingredients:
1 Egg
1 roasted bell pepper
1 roasted jalapeno
1 head of roasted garlic
salt
pepper
cayenne
lemon juice from 1 lemon
2 tbsp mayo
3 tbsp Dijon Mustard
Safflower oil

Cut the top off the garlic head so you can see the cloves inside. Rub with olive oil and cover in foil. Leave the peppers whole, wash them and rub with olive oil. Roast at 350 degrees. The peppers take about 30 mins until blistered. Keep turning to let them blister evenly. The garlic takes about 45-50 mins. Once peppers are done, put them in a paper bag for 10 mins to steam and cool enough for you to remove skin, stems, ribs and seeds. Take garlic out of foil to cool and then just squeeze the cloves out.


In a food processor, put all the ingredients in except the oil. I just eyeball the spices. Again, I like stuff spicy, so I do a lot of cayenne. Pulse until combined. Then slowly feed the oil through the tube as the mixture blends. Unfortunately had another oops : (
The safflower oil came out a little too fast, so my aioli was too thin. I then added some Dijon and mayo to thicken it up. Still thin, so it's more like a sauce then a mayo. But still tasted amazing. I put it in a airtight container and put it in a fridge.


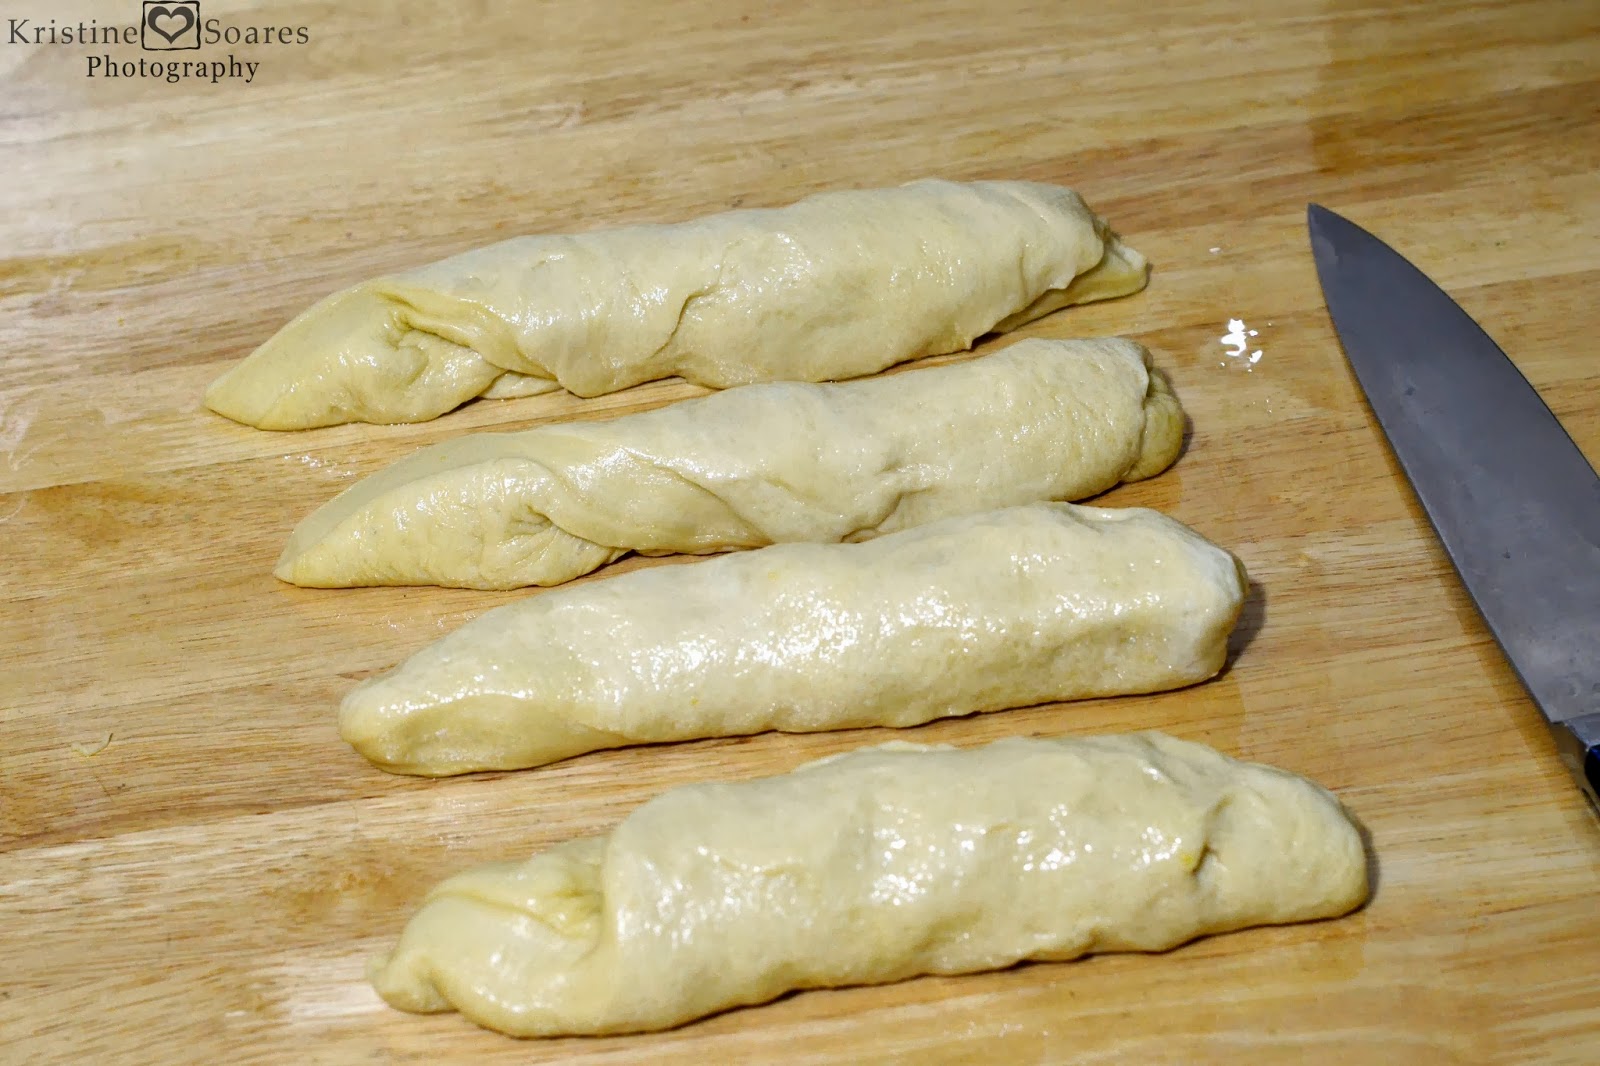
Now the dough is ready for the next step. Split it into 8 sections of dough and form into a ball. Put on parchment lined cookie sheet. Cover with clean dish cloth and let it rise another hour or so.


Time for the crab cakes.
Ingredients:

1 can good quality jumbo lump crab
4 oz shrimp peeled and deveined
1/2 bell pepper seeded and chopped
1 whole onion minced
1 1/2 cups Panko bread crumbs
black pepper
heavy cream
milk
lemon juice

I went to the local fish market and got a can of good quality lump crabmeat. I pick through it to look for any shell. One trick America's Test Kitchen taught me was to soak the crab in milk and put in the fridge while working with the other components.


I also got unbelievable shrimp that is used for a binder (another ATK trick). These might have been too good to use for this purpose, but I couldn't pass on these babies!


The bread is ready to go in the oven. I heat it up to 400 degrees. I place a cheap foil pan filled with water on the oven floor (this helps to steam the bread). Mix together one egg and a little water. Brush on bread and top with any toppings you like. Bake for about 20 minutes or until golden on top.


Take 1/2 of the panko and toast in a pan. The other half needs to be crushed a little finer. I just put it in a plastic bag and using a rolling pin to crush them. Take all the panko and put into a big bowl. Wipe out the pan and add a little olive oil.  Add in onion and bell pepper. Add salt, a little lemon juice and pepper and let saute for about 5 minutes. Add that to the panko bowl. In a food processor add your peeled and deveined shrimp. Pulse a few times. Then while the blade is on, slowly pour in some cream. It will create a mousse. Add that to the bowl. Now drain the milk from the crab and add that to the bowl. Mix well until all combined. Create patties. Add oil to a large pan and a few patties at a time. Let them develop a nice crust on each side.


Now that all the pieces of the puzzle are done, time to assemble. I was dying to try this out.


If there was ever a recipe where you could taste the love that was put in it, this would be it. When I asked how it was, my husband couldn't even form a sentence. He sat there happily eating with a smile on his face. That was the biggest pat on the back I could receive.

Friday, March 7, 2014

Challah! Or the longest Saturday in the kitchen


Last Friday, still all jazzed from making my own bagels, I decided to take a stab at another bread. I wanted to make challah. If you are not familiar with challah, it is a delicious eggy, fluffy bread often served during Jewish holidays. It is also beautiful to look at. It's braided and glossy from an egg wash, creating a gorgeous mahogany color. Little did I know just how long I would be in the kitchen trying to create this masterpiece. As with anything life, mistakes happen. Point blank, I had a little oops. But in keeping with my resolution (trying to believe in myself and not giving up), I asked my husband for help. I regrouped and was determined to finish what I had set out to do. I was in the kitchen late into the night, but in the end it was worth it.

Recipe from King Arthur Flour (the flour of choice in our house) http://www.kingarthurflour.com/recipes/classic-challah-recipe. Here is the doubled recipe because I wanted two loaves, one for now and one to freeze.

Ingredients:

1 cup of warm water
12 tbsp of vegetable oil
1/2 cup of honey
4 eggs
8 cups of All Purpose Flour
3 tsp of salt
2 tbsp of instant or active dry yeast

Glaze:
1 Egg
1 tbsp of water

I grab the biggest bowl we have. This bowl is massive, even next to our enormous fruit bowl.


All the ingredients go into the bowl. And here is what I think is my first oops. The recipe doesn't require proofing the yeast, but I actually think it could use it. So next time, I will add the yeast to warm water and let it do it's thing and get fizzy before I add it to the dry ingredients.


I actually have to position the bowl on a chair propped up against our cabinets, just to hold it steady while I mix it in by hand.


And here was oops number two. I just don't think I kneaded the dough long enough. After kneading, I covered the bowl with plastic to let it rest for 2 1/2 hrs. It should have doubled in size. It didn't wah wah. But instead of being defeated by a damn loaf of bread, I called in for backup. My husband, who I often see has MacGyver, had a suggestion. He took out the food processor and small sections of the dough and started reworking it. Adding a little yeast, the dough blade did it's magic. We finally had the right consistency. Covered it again and let it rest for another 2 hours. 

Magic.


Now I gently punch down the dough and put it on a lightly greased surface. I cut it in half and then into 4 sections. I roll those sections into 6 inch logs. Those needed to rest another 10-15 mins.


Then I rolled them out until they were about 15 inches, it's really like making Playdoh snakes here lol. Let those rest another 10 mins. Then roll again until they are about 20 inches. They may reduce down to 18 inches or so.


Time for the braiding. Pinch the tops all together. Then take the rope farthest to the right and go over the rope next to it, under the following and over the last one on the left. Repeat that. Over, under, over. Until you run out of rope. Tuck the ends underneath the bread.


Let it rest on a cookie sheet for about 15 mins. And now, whisk together an egg and a tbsp of water together. With a brush, "paint" the dough with the egg wash.


Preheat the oven to 375 degrees and once ready, it's finally time to bake! I have a convection oven, so I know that it will bake quickly. If you don't have a convection oven, you may want to put your cookie sheet on top of another cookie sheet to keep the bottom of the dough safe from burning.

 And it's now 10 pm. I'm hanging in there, but dying for this bread to be ready. I bake it for about 18 mins (on convection bake) and at this point the house smells so amazing, I could eat the bread raw...but I won't. I tent the bread with foil so it wouldn't get too browned on the top. I bake it for another 20 mins and drum roll please.....


And yeah...it was as good as I dreamed it would be. Mazel.

Wednesday, March 5, 2014

When life brings snow, bake bagels


Yesterday I was walking down the aisles of BJ's Wholesale Club, looking for my gigantic size bags of raw almonds and raisin medley when I decided to check out the bakery section. When I'm not too concerned about my diet, I love getting their bagels. They are chewy, toast great and the price is pretty reasonable. But then, my Mommy light bulb came on. Why don't I try making my own? That way I can control the ingredients and portion. Plus, have the general satisfaction of making something that's just so damn convenient to grab off the grocery shelf. 

I got home and poured through my cookbooks and Google. Most recipes called for a combination of bread flour and all purpose. I wanted to make it with white whole wheat. Then I stumbled on a cute little blog, Hidden Fruits and Veggies. Their recipe called for all white whole wheat (http://www.hiddenfruitsandveggies.com/?s=bagels&submit=Search). Sold!

While my little guy was at school, I began my science experiment..er...baking.


Combine a tbsp of active dry yeast, 1/4 cup of warm water and 1 tbsp of sugar and stir. Let that sit for about 5 mins.

Combine 4 cups of white whole wheat flour, 2 tsp of salt and 2 tbsp of sugar in a large mixing bowl or you can use your stand mixer. For extra fiber, I also threw in a tbsp of flaxmeal.


When your yeast mixture is all bubbly after about 5 mins, it's time to add that to your flour mixture. If it hasn't bubbled, something is wrong with the yeast and the recipe won't work.


After you have combined the yeast with the flour, start adding in another 1 1/2 cups of warm water to create the dough. Do this slowly. If using your hands (like the silly lady I am), make sure you are incorporating all the dry bits along the side of the bowl. Once fully incorporated you should have a nice ball of dough like this.


I rubbed extra virgin olive oil all over the dough (you can use nonstick spray), returned to the bowl and covered with plastic wrap. Brought into a warm room and allowed it to rest(and rise) for a little over two hours. At this point it will almost double in size.


It was time to go pick up my little helper for him to do the fun part. Adding the holes to the bagels! I divided the dough into 12 mostly equal portions. And let the dough rest again for another 5-10 mins. And then it's bagel shaping time!

Just stick your thumb (clean hands!) in the center and create your bagel holes.


Now your beautiful little bagels need to rest again for about 20 mins before boiling. So for us, that means it's time for being goofy in the kitchen.


Once the 20 mins are up, start boiling about 2 inches of water in a large saucepan. Boil 3 bagels at a time about 90 secs on each side. While they are still warm, press in some cornmeal on the bottom which helps reduce sticking while baking. This is also the time to add any topping if you want, just press them in the tops gently. I stuck with plain for now, but next time I might try making everything bagels for the hubby!


Heat your oven to 425 and generously spray cookie sheets with nonstick spray. Bake about 8-10mins, flip and bake another 8-10 mins. This will depend on your oven and how well you like your bagels. 


The excitement in my house was electric (no cooking pun intended lol). My little guy was literally counting down the time until we could dig into one of these.

Totally worth the wait...