Kristine Soares Photography

Kristine Soares Photography

Recipes

Baking (7) Breads (3) Breakfast (6) Chicken (2) Chocolate (1) Condiments (4) Dessert (9) Dinner (12) Eggs (2) Fruit (3) Lunch (4) Pasta (3) Salad (2) Seafood (4) Snack (1) Snacks (11) Soup (2) Vegetables (8)
Showing posts with label Lunch. Show all posts

Wednesday, July 9, 2014

My Favorite Salad


It's hot.

So hot, that I don't want to cook, as I'm sure most of you don't either. How can I give my family a healthy, satisfying meal that won't have me looking like a drenched mess in the kitchen? Easy...salad!

A salad doesn't have to be boring. I look at it like a blank canvas. You can mix and match to your liking. This recipe is my absolute favorite. Especially on a hot summer day. We have had this salad at least twice a week and we never tire of it. Bonus, you don't really need to follow an ingredient list because it's whatever you want to throw in! That's why I call this the "Kitchen salad".

This has been the summer of lettuce (right now I'm hearing "summer of George" from Seinfeld in my head). Our garden has been churning out the most delicious types of lettuce for weeks now and I can't get enough of them.


I wash the lettuce thoroughly and use my salad spinner to get rid of excess water.


Chop and and peel any veg you want to add in. I like bell peppers and cucumbers. 


Then my favorite part of the salad is a crisp green apple. I like to leave the skin on (I use organic and still wash it well). Just cut it into bite size pieces.


For a little a bit of dairy/fat, I add in a few slices (cut into cubes) of a sharp cheddar cheese.


Now I add in a handful of raisins and cashews. This is when I really change it up. Sometimes I throw in dried cranberries or other dried fruit. Sometimes almonds or pistachios. Sometimes I'll also add sunflower seeds. It's really all about having different textures and taste profiles in your salad. That's what keeps it from getting monotonous. 


With a "fancy" salad like this one, I like to use a good olive oil and vinegar. Some bottled dressing work well too, I would choose a raspberry walnut or a poppy seed. These were found at this cool little local store http://www.newburyportoliveoil.com/.


The sequence goes: Oil-Salt&Pepper-Vinegar

And then your dinner is ready to enjoy. One big salad (Interestingly enough makes me think of another Seinfeld reference!) will feed our family well and leave leftovers for lunch if we reserve some without the dressing. 


Feel free to copy this exactly or experiment and make your own kitchen salad!

Friday, May 16, 2014

We Got the Beet


Recently I reached out to the Facebook world to find out what people would like to see more of on the blog. The answer? More easy dinner ideas. This salad couldn't get any easier.

I love turning a salad into a meal. Just like a soup, you can pretty much add anything you want into a bowl and call it done. When I see a roasted beet salad on the menu at good restaurant, I can't resist ordering it.

This has everything your taste buds crave. The saltiness of the goat cheese, the bitterness of the greens and the sweetness of the beets. And since I like a little spice, I throw in some toasted nuts with pepper. It may seem "fancy", but it's really quite simple.

Ingredients:

One package/bag of mixed greens
4-5 beets peeled and chopped
Goat cheese (the amount depends on you!)
Couple of handfuls of raw, unsalted walnuts/pistachios
1/2 tbsp of salted butter
Salt
Pepper
Olive oil


Dressing:
Balsamic vinegar
Extra Virgin Olive Oil
Coarse Salt
Pepper

I used both golden and red beets. I just love the pop of color.


Peel the beets, cut off the stems and chop into small pieces. If you haven't cooked beets before, beware, they do stain! Wash your cutting boards, knives and hands quickly after chopping them.


Line a cookie sheet with foil and "grease" it with a little olive oil. Add your beets and toss with a little olive oil, salt and pepper. Pop them into a 425 degree oven for about 20-25 minutes or until fork tender (Just keep an eye on them so they don't burn).

Oh...and I separate the two colors so they don't bleed into each other.


Wash your greens. I got this beautiful blend at the farmer's market and I couldn't wait to try it!


When he is feeling up to it, I get help from my little guy. He ALWAYS wants to help when I break out the salad spinner! Such a fun job for a curious boy.


In a small frying pan, I add chopped walnuts,pistachios and butter. Sprinkle with black pepper. Toast on medium/low heat until fragrant. Once done, I make the dressing.


First, I put together all the components of my salad. I drizzle about 2 tbsp of olive oil to coat everything and toss. Add in a pinch of coarse salt, couple of pinches of pepper and toss. Then I add the balsamic vinegar and give it a final toss. Crumble up as much goat cheese as you would like and top the salad.

This salad is a flavor explosion, just try not to fall out of your chair while your eating it!


Monday, May 12, 2014

For the Freezer


If you are like me (and the rest of America), you hate those nights when you are looking in your fridge and say "What's for dinner?"

I try to thwart those pesky thoughts with menu planning the week before. There are still times when we have plans and I don't have time to prepare that night's meal. Or, I just simply don't want to cook that night's meal!

So, what is one to do when they are stumped? Reach in the freezer for a quick, tasty dinner!

I grew up on frozen pizzas, boxed mac and cheese and I swear I could have turned into a chicken nugget. I think that speaks for most American kids, unfortunately. We want the best for our kids of course, but sometimes we need a break and it's just "easier" to let someone do the work for us. I'm going to show you how easy it really is to prepare some freezer favorites. With a little prep and time, you can stock up for a few weeks and will feel so good about what you will be feeding your family.


First, let's start with fish sticks

Ingredients:
The amounts will depend on just how much you want to make, but here is what I used.

2 1/2 lbs of white fish (I used haddock)
1 cup of all purpose flour
1 1/2 cups of Panko breadcrumbs
3 egg whites
Pinch of salt
Pinch of pepper
Paprika
Cayenne
Spray for pans


I start by creating "sticks" out of the fish.


I was able to get 24 pieces, not too shabby.


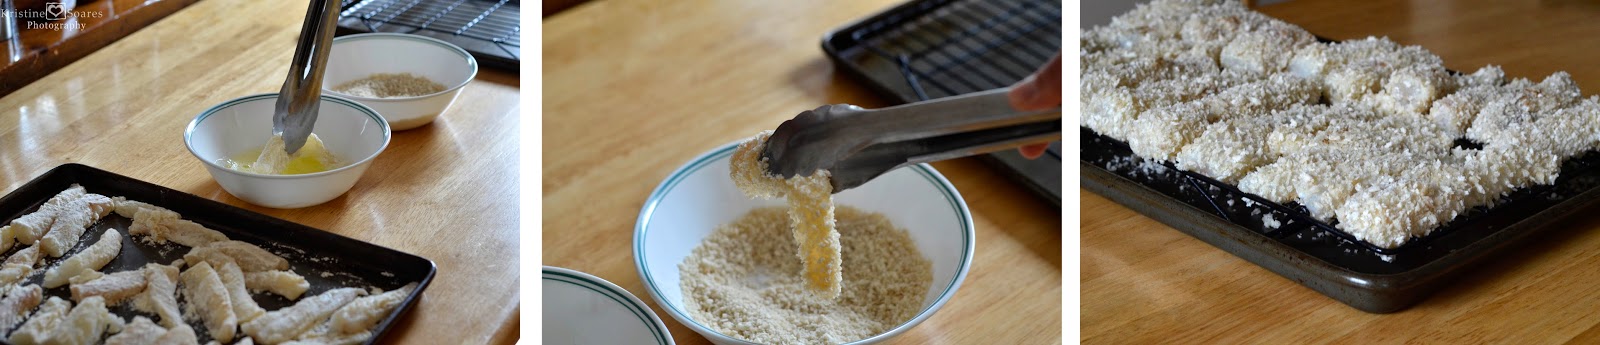
Dredge the fish sticks in the flour and shake off the excess. Put on a cookie sheet and place in the fridge for about 20 minutes.


I use Panko breadcrumbs, because they create the perfect crunch.


Mix together the spices, salt and pepper with the Panko. Now get your stations ready. Essentially, you are creating a very efficient assembly line.


See my pretty little set up? First you have the chilled floured fish. Next the egg whites that have been lightly whipped. Then the breadcrumb mixture (I don't put all of them in the bowl, after awhile they get too soggy. Just replenish as needed). Then I use a sprayed cooling rack on top of a cookie sheet. This will help to get the fish get crispy evenly. If you don't have cooling racks, I would spray foil and just frequently turn in the oven, to ensure even browning.

Dip fish in the egg white. Roll in breadcrumbs. Place on rack. Repeat. It's that simple.


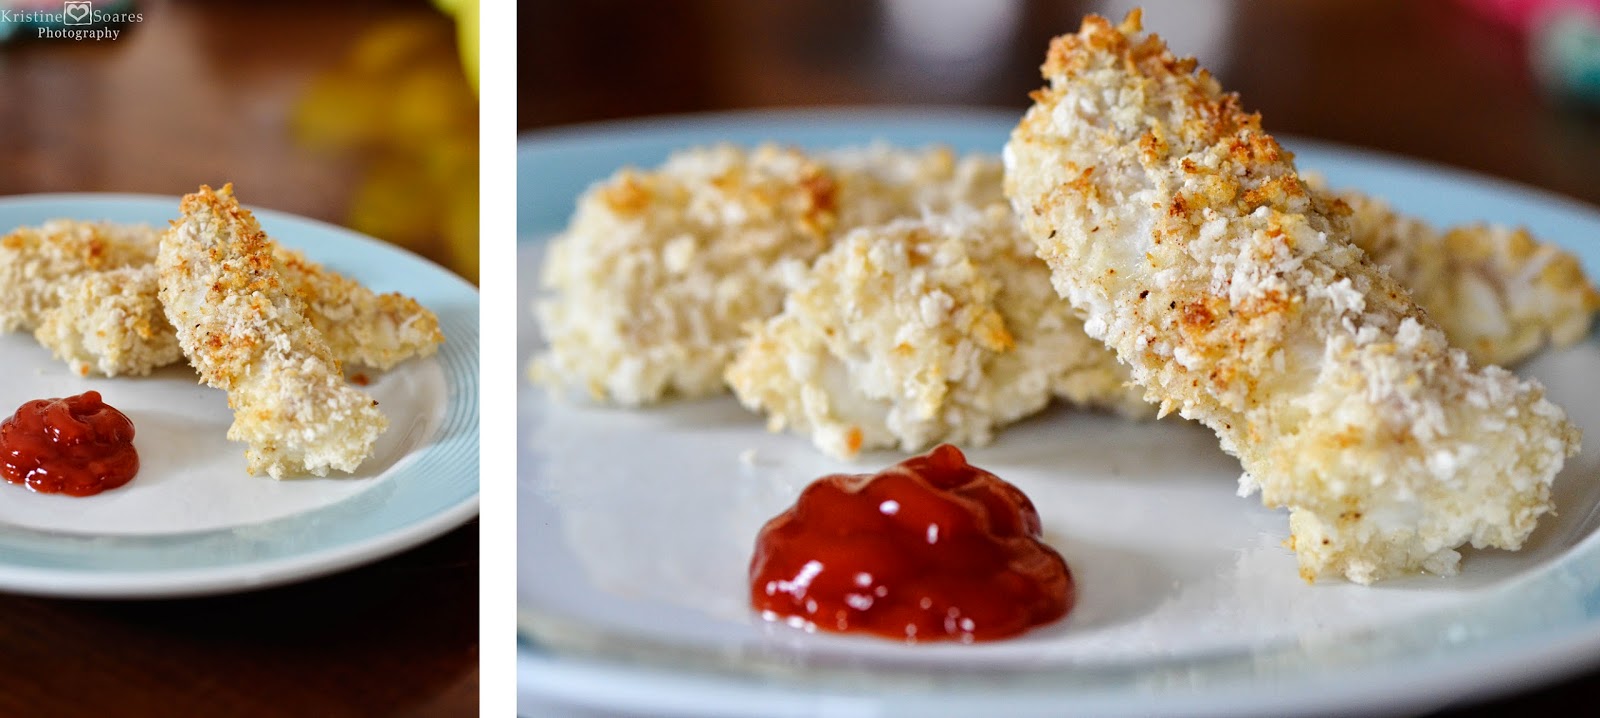
Place them in a 400 degree oven and cook for about 15 minutes or until they start browning and flake nicely.


And now, the chicken "nuggets".

Ingredients(again this will depend on how much you want to make):
1/4 cup of Dijon mustard
1/4 cup of Mayo
1 1/2- 2 lbs of boneless skinless chicken breast
1 cup of seasoned breadcrumbs


Same sort of set up as before. Dip in the liquid, shake off excess and roll in breadcrumbs. This time I just place it on sprayed foil.


I made both chicken tenders and nuggets, just because!


Now, here's a little tip. Use tongs. It creates less of a mess. But, if you are in a hurry and want to work with more than one piece at a time, use your fingers. Beware of the claw!


Pop them in a 350 degree oven for about 20-25 minutes or until they are no longer pink inside and juices run clear.


Wait until they are fully cooled and put them in a freezer bag. If you have a lot, I would either separate them with layers of wax paper or just use more bags. Then just reheat like you would store bought freezer foods. Enjoy!

Sunday, April 27, 2014

Rainy Days Call For Soup


 The saying goes "April showers bring May flowers".

It's spring, so we all want sunnier weather, but Mother Nature needs to do her thing. On those days when it's raw, cold and drizzly (or downright pouring!), I like to have a comforting bowl of soup. Since this past weekend was pretty dismal in the weather department, I thought I would share with you my "famous" potato leek soup.

Yes..it is famous. Well, in my inner circle it is! Potato leek soup is easy, delicious and healthy. My version doesn't contain dairy and actually very little potato. To get that creamy, thick soup that feels indulgent, I use my secret weapon.

Rutabaga. There. Cat's out of the bag. I use rutabaga in my soup to replace some of the potatoes. Trust me it works!


 Ingredients:

2-3 medium sized leeks prepared ( I will walk you through this!)
2-3 medium russet potatoes peeled (or whatever potatoes you have on hand)
3 carrots peeled
1/2 or whole rutabaga peeled depending on the size
6-8 cups of chicken or veggie broth
2 Tbsp of olive oil for the pot
All to taste
Pepper
Red pepper flakes
Salt

Let's start with the leeks, since they are really the star of the show. My friend Jacques, as in Jacques Pepin (okay, I don't know Jacques, but I wish I did!), taught me a really cool trick with leeks. Generally you are suppose to only use the white and very light green portion of the vegetable. Jacques, being the genius that he is, has a way to carve the leek to reduce waste.

Begin making a cut where the light green ends, following along in a circle until you've cut the first leaf off. You should see that the line of light green is higher on the inner leaf. Make another cut like your first. Again, the light green is higher. Continue cutting until you have two smaller leaves left. Then just cut those at it's lightest point.


Set aside your leftover leek tops to use for veggie stock or toss them.

This is what you will be using for the soup. Looks pretty doesn't it?


 Notice how dirty it is? Leeks are notoriously dirty. So here's another Pepin tip to ensure you can really get into the leaves and clean the leeks well.

Make 1 slice down each side (so 4 cuts total) and fan out all the leaves.


 First I soak the leaves in a bowl of cold water. Then I rinse the individual leaves. Really get in there and get all the dirt and sand out.


 Once all clean, finely chop the leeks (discard the stem), add oil to large stock pot at medium heat and throw in your chopped leeks. Saute for 5 minutes, stirring occasionally so as not to burn.

Peel your other veg (rinse the potatoes after peeled!) and chop. I like to chop them fairly small because they cook faster. Add to the pot and put in your pepper and red pepper flakes if using. Cook for another 5 minutes and then you can add your broth.


 Let everything simmer until all your veggies are really tender, almost mushy. Taste the broth and adjust seasoning as needed. Now, comes my favorite part, blending it all until nice and smooth.

I use an immersion blender. Using a standard blender to puree hot soup can be scary. I've never really tried it, but I've read it can melt parts of the machine, not to mention cause burns. If you don't have access to an immersion blender, I recommend cooling the soup (this does take time) and doing small batches.


 Once your soup is well blended, check your seasoning again. Once you feel it has enough salt/pepper, take it off the heat and serve. I just happened to have made a nice hearth loaf that worked beautifully with it. You could also serve it in a bread bowl (yum!) or with crispy toast pieces on top.


 Now that will make you feel all nice and cozy!