One woman's attempt to balance love of family, living "healthy" and photography. All while trying to get dinner on the table.
Recipes
Showing posts with label Dessert. Show all posts
Sunday, July 6, 2014
"Dancing in Meadows of Strawberry Jam"
This entry will be a little different, as my husband is doing the cooking! Actually, we are calling it a team effort.
The day before the 4th of July, my son and I went strawberry picking again(http://kristinesoares.blogspot.com/2014/06/strawberry-fields-forever.html)! Because they were so good the first time, we need to get more before the picking season ended. This time we got over 6 pounds! We had a plan, a "jam plan" (Friends fanatics will know what I'm referring to).
I needed some help, as I've never canned anything before. Marc, however is pretty skilled at this. He's spent hours canning tomatoes, relish and sauce. Lucky for us, he had some time off and we spent our rainy 4th of July making bread and strawberry jam. And boy was it good.
Ingredients:
Roughly 6lbs of ripe strawberries hulled and washed
A little less than 3 cups of sugar
2 packets of Sure-Jell low/no sugar pectin
2 tbsp lemon juice
My "job" was to hull all of these babies and some of them were super tiny. Thankfully, Marc decided to buy us a strawberry huller which made it faster. It kind of looks like this one http://www.amazon.com/Fox-Run-5582-Strawberry-Huller/dp/B006CFQ33K/ref=sr_1_5?ie=UTF8&qid=1404676381&sr=8-5&keywords=strawberry+huller
Wash and dice the strawberries
In a large pot, cook them down until strawberries are very tender. Mash them up a little. If you want a smooth jam, just blend it with a immersion (stick) blender.
Add in your pectin
Then 1/4 cup of the sugar and bring the mixture to a rolling boil.
After the rolling boil, add remaining sugar and boil again for another minute. Take off the heat. Big hint, taste as you go! You may or may not need all of the sugar listed. This jam is not nearly as sweet as some others (others would call for double the sugar then what we used), but taste before you add it all in. If the fruit is sweet enough on it's own, you can probably omit some sugar.
Prepare your jelly jars. First we wash them well with soap and water. I am a novice at this part, so follow along proper safety instructions (http://www.freshpreserving.com/getting-started).
Fill the jars, put on the lids and then they process in a water bath for ten minutes.
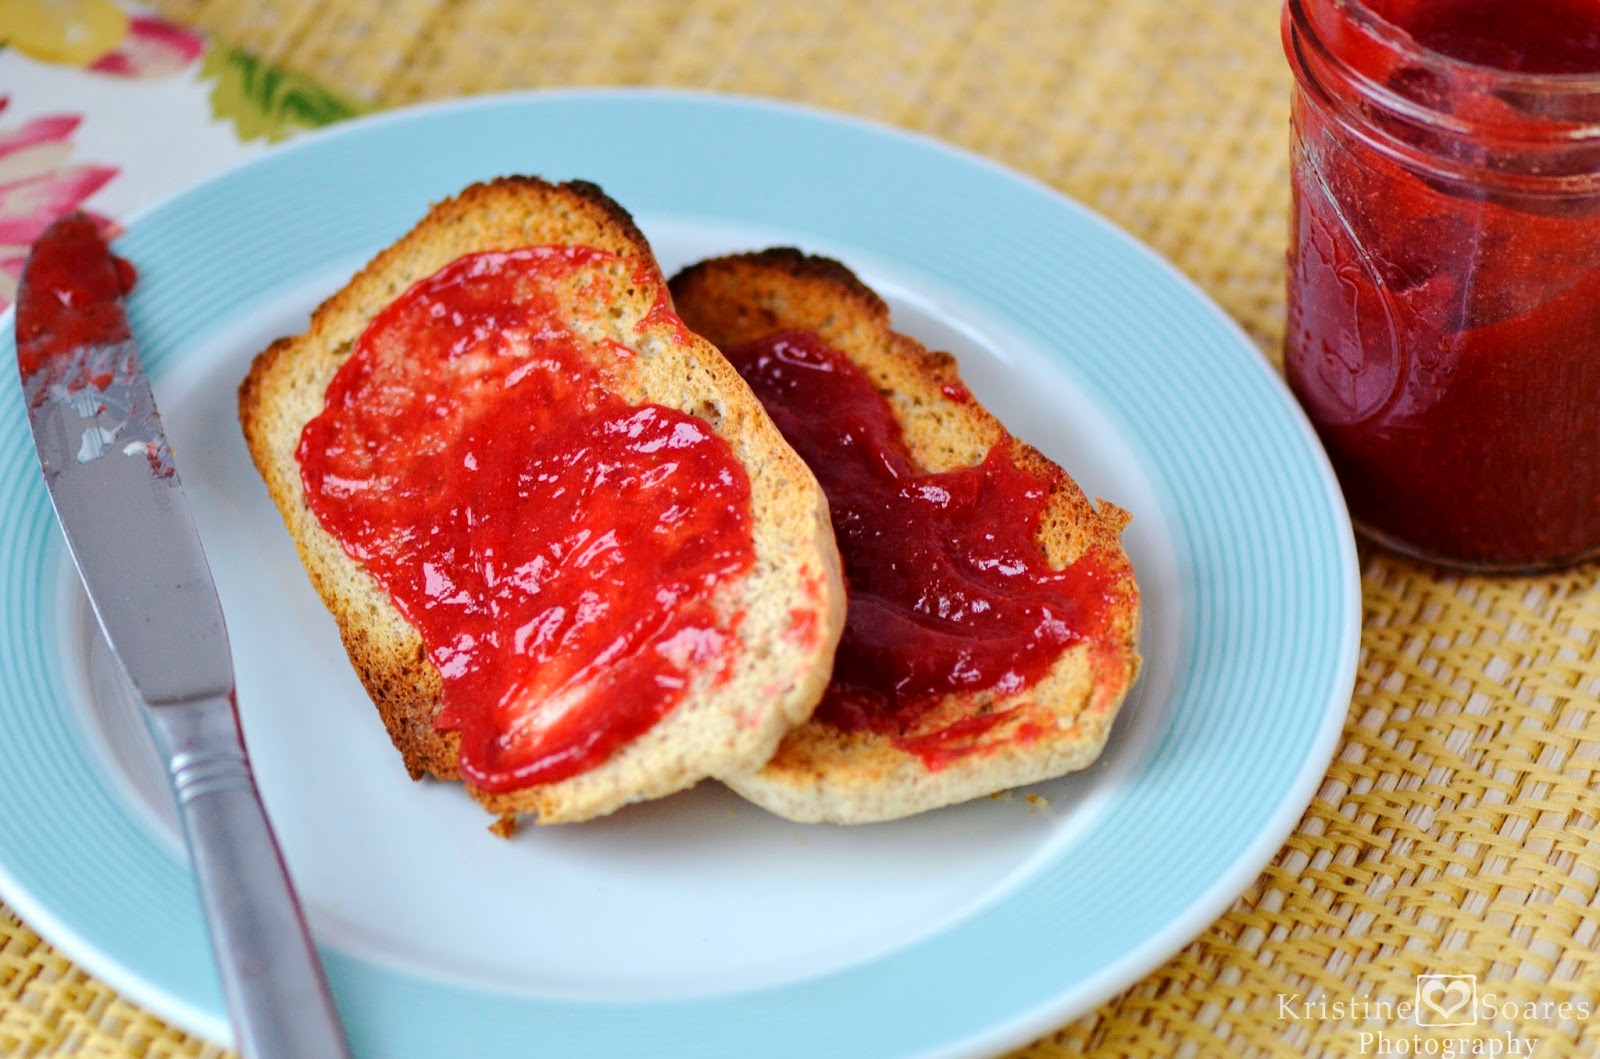
Take out and let cool. As they cool, the jam/jelly starts to set up nicely. This was the hard part, because all I wanted to do was try it on a piece of freshly made bread.
And then...it was time. Hands down, the BEST jam I've ever had.
Labels:
Condiments,
Dessert,
Fruit,
Snack
Monday, June 30, 2014
Strawberry Fields Forever
My son always likes to do a run through of the seasons and what special things we do during them. He lit up the other day when I reminded him that summer is strawberry picking time. Every year we end up so busy that we almost miss out on the opportunity. I was determined to not miss it! We went to one farm who claimed to still have pick your own, only to be turned away. This did not make for a happy boy. I had to look at that little face covered in disappointment.
We went home defeated. Had some lunch and a little rest and then I picked up the phone to check with another local farm. As soon as I heard that picking hours were ending soon, I grabbed the keys and we were out the door. We headed to Cider Hill Farm (http://www.ciderhill.com/) and had just about 25 minutes to run out in the fields and fill our baskets. In the intense heat of the afternoon, I plopped my son in one of their wagons and ran. I felt like Super Mom. And looking back at the smile on his face confirmed that for me. We worked fast and efficiently and ended up with 2 quarts of red, ripe berries.
We both were slightly giddy from excitement and a little delirious from the heat, I thought it would be an excellent night for an ice cream sundae. Not just any old sundae, it was going to be with cider donuts and strawberries. Oh...yeah...
Here's your "recipe":
Go find the best berries a local farm or your backyard can offer
I just love their fancy little hats
Find the tastiest cider donuts. I personally think Cider Hill's are the best (and I've tried many cider donuts before)!
Get your favorite vanilla ice cream. It needs to be a good quality ice cream. I was delighted to find Hodgies at Cider Hill!
It's summer, allow for an extra scoop since it melts. Because then it doesn't count, right???
P.S. I don't even care that the ice cream got all melty so fast. It just made it that much better.
Friday, May 23, 2014
Yogurt!
Sometimes in the kitchen, I feel like I am stepping back in time. Certain recipes let my mind wander back to when times were a little less complicated. People worked hard, processed food was a foreign concept and families spent real quality time together. I like my little daydreams while I cook.
When I learned to make yogurt, I really felt invigorated. I was not relying on a machine, just simple, everyday tools and a gallon of milk. I had no idea if it was going to work or even be good for that matter, but when I saw and tasted the final product, I must say my eyes welled up a little bit(in a good way)! It is the creamiest, smoothest yogurt I've ever had without too much tang. Funny thing is, I don't even eat yogurt! I never liked the after taste. I will put it in smoothies or swap sour cream for it in recipes, but hardly ate it on it's own. This may change all that for me.
I've been making yogurt now for a month. It's become a weekly occurrence, as my husband and son cannot get enough of it! My husband will eat it plain or top it with some frozen fruit. My son gets really giddy when I swirl a tiny bit of maple syrup on it.
Ingredients: (This recipe will make over 64oz)
9 cups of WHOLE milk (I found this to work best)
1 cup of plain store bought full fat yogurt, preferably Greek yogurt (Once you've made this, you'll have leftovers to become your starter for next time)
2 Ice Cubes
Equipment:
Candy thermometer
Whisk
Rubber spatula
Large pot
Ladle
2 32oz mason jars and 1 16oz mason jar (with screw on lids)
4 cup measuring cup
Towels
Insulated bag or cooler
Once again, I would like to give a shout out to Alana Chernila (http://www.eatingfromthegroundup.com/) for the inspiration. And for the awesome tip of icing the pot before you cook the milk. This will help try to prevent scorching. Still, watch the pot though, because scorched milk is no fun! I just take a couple of ice cubes and run it around the pot a few times and then dump them out before they completely melt.
Attach the thermometer to the pot and heat the milk to 180 degrees. Stir occasionally. Once it reaches 180 degrees, take it off the heat and let it cool down to 110 degrees. I remove the skin that forms on top. Pour the cup of yogurt into the measuring cup. Ladle 2 cups of the warm milk into the yogurt and whisk until well combined.
Close up the jars tightly and wrap in towels. I then double up two insulated bags (you know, the ones you use for grocery shopping?) and put the jars inside. I place the bag in a warm spot (just not directly in the sun!) in the house and let it do it's thing for 6-7 hours. After the yogurt has set, remove from the bags and put in the fridge. Sometimes, it can take less time to set or sometimes it takes longer. It all depends on the environment the yogurt is in.
Just look at how creamy it is!
Not that we've ever had the yogurt last longer than a week in our house, but the yogurt should keep well for at least 10 days. Once you've tried this and get the hang of making it, it really is quite simple. Plus, it's a huge money saver! With one gallon of milk, you can make almost 4 large containers of yogurt!
Be curious, be brave and have fun in the kitchen!
Labels:
Breakfast,
Condiments,
Dessert,
Snacks
Monday, May 12, 2014
How do you like them apples?
Do you have kids that get hungry just about every 45 minutes? Are you constantly on the go and need healthy snacks for them as well as yourself? Then, this blog post is just for you. Wow...I just sounded like an infomercial.
But honestly, there is a real need for portable healthy snacks. There has been a recent boom in food pouches and they have gone over really well in our house. My son loves the different types of applesauce and I love that some are even blended with veggies. I got to thinking, 'well I use to make his baby food and that's basically the same concept?', I just needed to find the right containers. Enter, Yummi Pouch http://www.yummipouch.com/.
I learned about Yummi Pouch through the wonders of Facebook. I searched Amazon and found these pretty reusable packages on sale! They hold 6 oz (I somehow fit 7oz in there) and they can be put in the freezer and the dishwasher. I was sold. Now, what goodies could I start with? My son requested Apple Mango sauce. Well, okay then!
Ingredients:
2 ripe mangoes chopped
6-7 different varieties of apples peeled, cored and chopped
1/4 cup of brown sugar (optional)
Pinch of salt
1 tbsp of cinnamon
Couple of pinches of nutmeg
Couple of squeezes of lemon juice
1 1/2 cups of water (or you could bump up the flavor with juice, but beware of extra sugars)
I recently found a great apple for snacking and cooking. Introducing, the Mutsu apple. It's a cross between a Golden Delicious and an Indo apple. It's crunchy and sweet, but not too overpowering. It paired really well with the pink lady apples I threw into the mix.
Begin by peeling, coring and chopping your apples. You can leave the skins on, but to create a really smooth sauce for these pouches, I peeled them.
Now prepare your mango. I am not ashamed to admit I Googled the proper way to slice a mango. I cut down the outer sides, then made horizontal and vertical cuts to the flesh (but don't go through the outer skin!). Then you can pop it up and then scoop out the fruit.
Add your fruit to a large bowl and throw in your brown sugar, salt and spices.
Mix everything well and throw it into a stock pot. Add your water. Cook on medium/low heat until everything gets pretty mushy.
Using a potato masher or immersion blender, mash up all the fruit. Either place in a container or pouch and refrigerate. Or, if you are like my son, eat a bowl of it as soon as it cools down!
Sunday, May 4, 2014
Hot Fudge Sunday
What better way to end a great weekend then with a nice sweet dessert?
It's been a weekend full of family time and bargain hunting. Spring means the beginning of new life in the garden, the chickens are growing up and it's also the start of the yard sales and flea market shopping (blog post to come!). One of the special things I like to do on weekends is make a yummy treat. Like I said before, we try to eat healthy, but we only live once! And this mama's gotta have her chocolate.
One time I was watching Ming Tsai on PBS and Duff Goldman (Ace of Cakes) was on. They were going to make desserts, Ming's was a beautiful Tarte Tatin and Duff's was a supremely indulgent looking fudge. It included bacon and dulce de leche. He called it Mexican Breakfast Fudge (http://www.ming.com/food-and-wine/recipes/simply-ming-season-11/duff-goldmans-mexican-breakfast-fudge.htm) and I knew I had to make it.
I have very little candy making experience, so I was a little intimidated. But, I wasn't going to let that stop me.
Ingredients:
1 can of sweetened condensed milk
4 1/2 cups of sugar
2 tbsp of cocoa powder
1 1/2 cups of heavy cream
Pinch of salt
4 1/2 tbsp of light corn syrup
6 oz of unsweetened chocolate chopped
9 tbsp of unsalted butter
1 vanilla bean scraped
1 tsp of good vanilla extract
Spray for pan
Original recipe called for bacon and walnuts and 3 vanilla beans scraped. I omitted the nuts and bacon and I only had one vanilla bean on hand, so I improvised.
The reason I chose to make this fudge, was the amazing "magic" trick Duff did to make the dulce de leche. I was absolutely dumbfounded when I saw that it worked. First, you peel the label of the can of sweetened condensed milk and then you boil the can for 3 hours.
That's right! You boil the whole can! And then you get dulce de leche. What?! I had to see this for myself.
I soon realized I would need a bigger pan than the one I originally chose. So, remember to get a bigger pot (one that's sturdy on the bottom) and fill enough so it just about covers the can. Keep an eye on it and refill with water as needed. Once the 3 hours are up, cool the can (I lifted it out with tongs) in an ice bath for about a half an hour.
Now, I was so excited about the outcome, I completely forgot to photograph it with my camera! I did however manage to get some pictures with my phone. So, excuse the picture quality!
Amazing right? And it tasted as sinful as it looked. Now onto the fudge.
In a large bowl, combine the sugar, cocoa powder and salt and mix together until well combined and there are no clumps. In another bowl combine the heavy cream and corn syrup and blend well. Now, you will slowly mix the wet ingredients into the dry ingredients. What I did was wrap a towel around the base of the big bowl as I mixed the ingredients. It helps the bowl from slipping.
The consistency will begin to look like a batter. Make sure it doesn't have clumps.
Now begin chopping the chocolate.
Cut the vanilla bean right down the middle. When you open it up, you will see tiny little black seeds inside. That's the good stuff! Scrape it out carefully and set aside.
Add your mixture to a large pot (I just cleaned out the one I made the dulce de leche in) and place a candy thermometer on the lip of the pot. Cook this on high until it reaches 235-240 degrees. Stir occasionally so it doesn't scorch the pan.
Once it reached soft ball stage, mix in the chocolate with a heat proof spoon or spatula. Add the butter and once that's melted, the vanilla. Here's where I think I had an issue (although I didn't know it until later). The instructions didn't talk about crystallization. Stirring too frequently can actually cause the sugar that was melted to re-crystallize. So, stir, but use caution. I think this is where candy making really takes practice to perfect.
Remove the fudge from the heat and pour one third into a prepared pan. I used an 8x8 square (a 9x9 would have been better, but I don't have one) pan. I sprayed the pan and then placed parchment paper inside with some paper hanging over the sides so the fudge can easily be removed.
Once a third of the chocolate has been poured, add in some of the dulce de leche and make little swirls with a spoon. Add more chocolate, then more dulce de leche. Repeat until you've used all the ingredients. Let it cool to room temperature before taking the mold out of the pan. You want to make sure that the fudge has set or hardened.
Now, for the best part.
Wowza. We couldn't wait to dig into this.
Even though the sugars crystallized a little and left the fudge on the gritty side, man was this good. The combination of the intense chocolate with the creamy dulce de leche was pure Heaven. And a little goes a long way.
Fudge is definitely a treat. We can't eat this stuff every day or else we'd be headed to the dentist more often. But it is nice to have in the fridge for those times when you just need a little something to cure that craving.
Have a great rest of the weekend!
Subscribe to:
Posts (Atom)