Kristine Soares Photography

Kristine Soares Photography

Recipes

Baking (7) Breads (3) Breakfast (6) Chicken (2) Chocolate (1) Condiments (4) Dessert (9) Dinner (12) Eggs (2) Fruit (3) Lunch (4) Pasta (3) Salad (2) Seafood (4) Snack (1) Snacks (11) Soup (2) Vegetables (8)

Friday, May 23, 2014

Yogurt!


Sometimes in the kitchen, I feel like I am stepping back in time. Certain recipes let my mind wander back to when times were a little less complicated. People worked hard, processed food was a foreign concept and families spent real quality time together. I like my little daydreams while I cook.

When I learned to make yogurt, I really felt invigorated. I was not relying on a machine, just simple, everyday tools and a gallon of milk. I had no idea if it was going to work or even be good for that matter, but when I saw and tasted the final product, I must say my eyes welled up a little bit(in a good way)! It is the creamiest, smoothest yogurt I've ever had without too much tang. Funny thing is, I don't even eat yogurt! I never liked the after taste. I will put it in smoothies or swap sour cream for it in recipes, but hardly ate it on it's own. This may change all that for me.

I've been making yogurt now for a month. It's become a weekly occurrence, as my husband and son cannot get enough of it! My husband will eat it plain or top it with some frozen fruit. My son gets really giddy when I swirl a tiny bit of maple syrup on it.

Ingredients: (This recipe will make over 64oz)

9 cups of WHOLE milk (I found this to work best)
1 cup of plain store bought full fat yogurt, preferably Greek yogurt (Once you've made this, you'll have leftovers to become your starter for next time)
2 Ice Cubes

Equipment:

Candy thermometer
Whisk
Rubber spatula
Large pot
Ladle
2 32oz mason jars and 1 16oz mason jar (with screw on lids)
4 cup measuring cup
Towels
Insulated bag or cooler


Once again, I would like to give a shout out to Alana Chernila (http://www.eatingfromthegroundup.com/) for the inspiration. And for the awesome tip of icing the pot before you cook the milk. This will help try to prevent scorching. Still, watch the pot though, because scorched milk is no fun! I just take a couple of ice cubes and run it around the pot a few times and then dump them out before they completely melt. 


Attach the thermometer to the pot and heat the milk to 180 degrees. Stir occasionally. Once it reaches 180 degrees, take it off the heat and let it cool down to 110 degrees. I remove the skin that forms on top. Pour the cup of yogurt into the measuring cup. Ladle 2 cups of the warm milk into the yogurt and whisk until well combined. 


Add the milk/yogurt mixture into the pot with the rest of the warm milk and whisk until a little frothy. Pour carefully into your jars.


Close up the jars tightly and wrap in towels. I then double up two insulated bags (you know, the ones you use for grocery shopping?) and put the jars inside. I place the bag in a warm spot (just not directly in the sun!) in the house and let it do it's thing for 6-7 hours. After the yogurt has set, remove from the bags and put in the fridge. Sometimes, it can take less time to set or sometimes it takes longer. It all depends on the environment the yogurt is in.


Just look at how creamy it is!


Not that we've ever had the yogurt last longer than a week in our house, but the yogurt should keep well for at least 10 days. Once you've tried this and get the hang of making it, it really is quite simple. Plus, it's a huge money saver! With one gallon of milk, you can make almost 4 large containers of yogurt!

Be curious, be brave and have fun in the kitchen!

Tuesday, May 20, 2014

Flaky, in a good way


Oh my goodness, just looking at the above picture gets me giddy for breakfast. Or even a late night snack! Who knew bran flakes could be so darn tasty?

I hope that other food bloggers understand just how much I appreciate them. I spend a lot of time scouring the Internet for easy, go-to recipes that will detach my family further from processed foods. I've made granola before and loved it, but what about flakes? Could it be done? Of course it can, thanks to finding the adorable site Willow Bird Baking (http://willowbirdbaking.com/)!

I doubled the recipe, because my son and I love a good cereal in the morning, especially when we are in a hurry. Keep in mind that this is a super easy recipe, but like all good things, it takes time.

Ingredients:

1 cup of wheat bran
1 cup of whole wheat flour
2/3 cup of almond flour
4 tbsp of sugar
1/2 tsp of baking powder
1/2 tsp of salt
2/3 cup of milk
1/2 cup of water
1 tbsp of ground flax

Preheat the oven to 350 degrees. Add all your dry ingredients to a large bowl, mix well and then add in the wet ingredients. It's a very wet mixture (no way of photographing it well), but trust me, it turns outs awesome.


I cut out four sheets of parchment paper, the size of my cookie sheets. I put a quarter of the dough on the parchment and cover with plastic wrap. Then I roll out the mixture. I make it thin enough that it's almost see through.


Transfer the parchment (carefully!) to the cookie sheet and bake for about 10 minutes. Make sure to keep an eye on it so it doesn't burn. Take it out and let cool. Since I doubled the recipe, I just remove this parchment and cool on the counter so I can get the rest of the dough in the oven.


Once all your giant flakes are cooked and cool enough to the touch, break it up into small(ish) pieces. Turn the oven down to 275 degrees and bake the pieces for another 20 minutes. Turn the flakes occasionally so they brown evenly.


I couldn't wait to see if these were as good as store bought cereal. Gave my son a bowl and got the thumbs up! What I really couldn't believe, was how well they held up in milk! Next time, I'm adding a touch of vanilla, cinnamon and maybe some raisins. Breakfast just got a lot more interesting!


Friday, May 16, 2014

We Got the Beet


Recently I reached out to the Facebook world to find out what people would like to see more of on the blog. The answer? More easy dinner ideas. This salad couldn't get any easier.

I love turning a salad into a meal. Just like a soup, you can pretty much add anything you want into a bowl and call it done. When I see a roasted beet salad on the menu at good restaurant, I can't resist ordering it.

This has everything your taste buds crave. The saltiness of the goat cheese, the bitterness of the greens and the sweetness of the beets. And since I like a little spice, I throw in some toasted nuts with pepper. It may seem "fancy", but it's really quite simple.

Ingredients:

One package/bag of mixed greens
4-5 beets peeled and chopped
Goat cheese (the amount depends on you!)
Couple of handfuls of raw, unsalted walnuts/pistachios
1/2 tbsp of salted butter
Salt
Pepper
Olive oil


Dressing:
Balsamic vinegar
Extra Virgin Olive Oil
Coarse Salt
Pepper

I used both golden and red beets. I just love the pop of color.


Peel the beets, cut off the stems and chop into small pieces. If you haven't cooked beets before, beware, they do stain! Wash your cutting boards, knives and hands quickly after chopping them.


Line a cookie sheet with foil and "grease" it with a little olive oil. Add your beets and toss with a little olive oil, salt and pepper. Pop them into a 425 degree oven for about 20-25 minutes or until fork tender (Just keep an eye on them so they don't burn).

Oh...and I separate the two colors so they don't bleed into each other.


Wash your greens. I got this beautiful blend at the farmer's market and I couldn't wait to try it!


When he is feeling up to it, I get help from my little guy. He ALWAYS wants to help when I break out the salad spinner! Such a fun job for a curious boy.


In a small frying pan, I add chopped walnuts,pistachios and butter. Sprinkle with black pepper. Toast on medium/low heat until fragrant. Once done, I make the dressing.


First, I put together all the components of my salad. I drizzle about 2 tbsp of olive oil to coat everything and toss. Add in a pinch of coarse salt, couple of pinches of pepper and toss. Then I add the balsamic vinegar and give it a final toss. Crumble up as much goat cheese as you would like and top the salad.

This salad is a flavor explosion, just try not to fall out of your chair while your eating it!


Monday, May 12, 2014

How do you like them apples?


Do you have kids that get hungry just about every 45 minutes? Are you constantly on the go and need healthy snacks for them as well as yourself? Then, this blog post is just for you. Wow...I just sounded like an infomercial.

But honestly, there is a real need for portable healthy snacks. There has been a recent boom in food pouches and they have gone over really well in our house. My son loves the different types of applesauce and I love that some are even blended with veggies. I got to thinking, 'well I use to make his baby food and that's basically the same concept?', I just needed to find the right containers. Enter, Yummi Pouch http://www.yummipouch.com/.


I learned about Yummi Pouch through the wonders of Facebook. I searched Amazon and found these pretty reusable packages on sale! They hold 6 oz (I somehow fit 7oz in there) and they can be put in the freezer and the dishwasher. I was sold. Now, what goodies could I start with? My son requested Apple Mango sauce. Well, okay then!

Ingredients:

2 ripe mangoes chopped
6-7 different varieties of apples peeled, cored and chopped
1/4 cup of brown sugar (optional)
Pinch of salt
1 tbsp of cinnamon
Couple of pinches of nutmeg
Couple of squeezes of lemon juice
1 1/2 cups of water (or you could bump up the flavor with juice, but beware of extra sugars)


I recently found a great apple for snacking and cooking. Introducing, the Mutsu apple. It's a cross between a Golden Delicious and an Indo apple. It's crunchy and sweet, but not too overpowering. It paired really well with the pink lady apples I threw into the mix. 


Begin by peeling, coring and chopping your apples. You can leave the skins on, but to create a really smooth sauce for these pouches, I peeled them.


Now prepare your mango. I am not ashamed to admit I Googled the proper way to slice a mango. I cut down the outer sides, then made horizontal and vertical cuts to the flesh (but don't go through the outer skin!). Then you can pop it up and then scoop out the fruit. 


Add your fruit to a large bowl and throw in your brown sugar, salt and spices.


Spritz in your lemon juice.


Mix everything well and throw it into a stock pot. Add your water. Cook on medium/low heat until everything gets pretty mushy.


Using a potato masher or immersion blender, mash up all the fruit. Either place in a container or pouch and refrigerate. Or, if you are like my son, eat a bowl of it as soon as it cools down!


For the Freezer


If you are like me (and the rest of America), you hate those nights when you are looking in your fridge and say "What's for dinner?"

I try to thwart those pesky thoughts with menu planning the week before. There are still times when we have plans and I don't have time to prepare that night's meal. Or, I just simply don't want to cook that night's meal!

So, what is one to do when they are stumped? Reach in the freezer for a quick, tasty dinner!

I grew up on frozen pizzas, boxed mac and cheese and I swear I could have turned into a chicken nugget. I think that speaks for most American kids, unfortunately. We want the best for our kids of course, but sometimes we need a break and it's just "easier" to let someone do the work for us. I'm going to show you how easy it really is to prepare some freezer favorites. With a little prep and time, you can stock up for a few weeks and will feel so good about what you will be feeding your family.


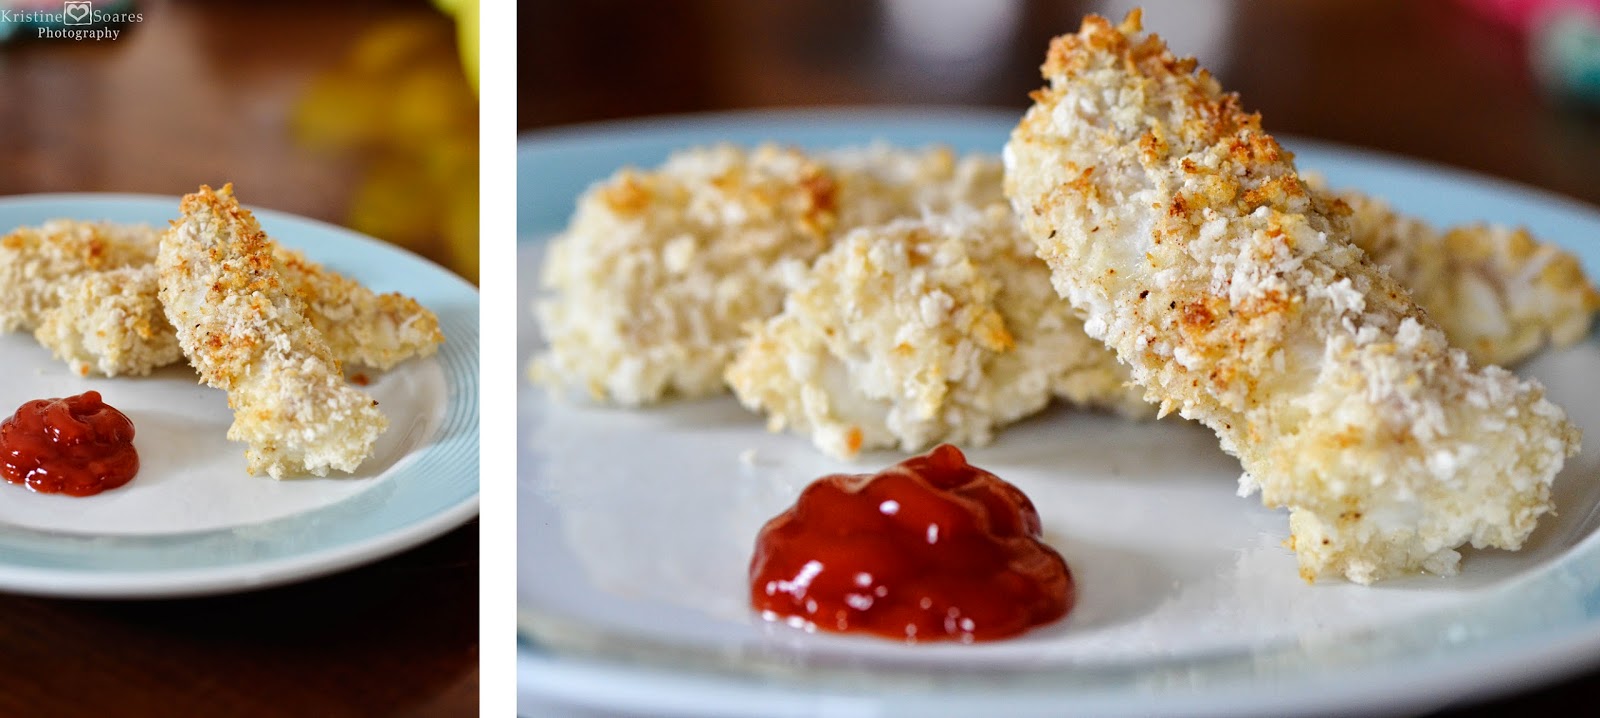
First, let's start with fish sticks

Ingredients:
The amounts will depend on just how much you want to make, but here is what I used.

2 1/2 lbs of white fish (I used haddock)
1 cup of all purpose flour
1 1/2 cups of Panko breadcrumbs
3 egg whites
Pinch of salt
Pinch of pepper
Paprika
Cayenne
Spray for pans


I start by creating "sticks" out of the fish.


I was able to get 24 pieces, not too shabby.


Dredge the fish sticks in the flour and shake off the excess. Put on a cookie sheet and place in the fridge for about 20 minutes.


I use Panko breadcrumbs, because they create the perfect crunch.


Mix together the spices, salt and pepper with the Panko. Now get your stations ready. Essentially, you are creating a very efficient assembly line.


See my pretty little set up? First you have the chilled floured fish. Next the egg whites that have been lightly whipped. Then the breadcrumb mixture (I don't put all of them in the bowl, after awhile they get too soggy. Just replenish as needed). Then I use a sprayed cooling rack on top of a cookie sheet. This will help to get the fish get crispy evenly. If you don't have cooling racks, I would spray foil and just frequently turn in the oven, to ensure even browning.

Dip fish in the egg white. Roll in breadcrumbs. Place on rack. Repeat. It's that simple.


Place them in a 400 degree oven and cook for about 15 minutes or until they start browning and flake nicely.


And now, the chicken "nuggets".

Ingredients(again this will depend on how much you want to make):
1/4 cup of Dijon mustard
1/4 cup of Mayo
1 1/2- 2 lbs of boneless skinless chicken breast
1 cup of seasoned breadcrumbs


Same sort of set up as before. Dip in the liquid, shake off excess and roll in breadcrumbs. This time I just place it on sprayed foil.


I made both chicken tenders and nuggets, just because!


Now, here's a little tip. Use tongs. It creates less of a mess. But, if you are in a hurry and want to work with more than one piece at a time, use your fingers. Beware of the claw!


Pop them in a 350 degree oven for about 20-25 minutes or until they are no longer pink inside and juices run clear.


Wait until they are fully cooled and put them in a freezer bag. If you have a lot, I would either separate them with layers of wax paper or just use more bags. Then just reheat like you would store bought freezer foods. Enjoy!